

Scrap Wood Challenge!
I tend to be a bit of a hoarder when it comes to scrap wood. Every so often I purge my stock with a self-imposed “challenge”. Complete a project using only the materials on hand. No money invested.
My parents needed something to put on a blank wall in their beach house. The whale was my idea. I picked a photo I liked to use as an outline for the whale’s shape.
Materials:
Plywood
Paint
Scrap Wood
Saw (I used a jig saw, but a scroll saw would probably be more appropriate)
Brad Nails
Hammer
Instructions:
Since I planned on only using scrap wood from my garage, the dimensions of my project were determined by the availability of materials. I had a large piece of plywood that I cut down to 2′ x 4′ with my circular saw.

It was in rough shape from being used as a workbench for a prior project so I decided to just put a layer of white paint on it.

Using the photo that I printed, I drew the whale shape on a large sheet of paper and cut it out.  I rummaged through my (very large) pile of scrap wood and pulled out several pieces that were all the same thickness. I arranged them next to one another until my whale cutout could fully fit on top of them.

I traced the outline of the whale onto the wood.

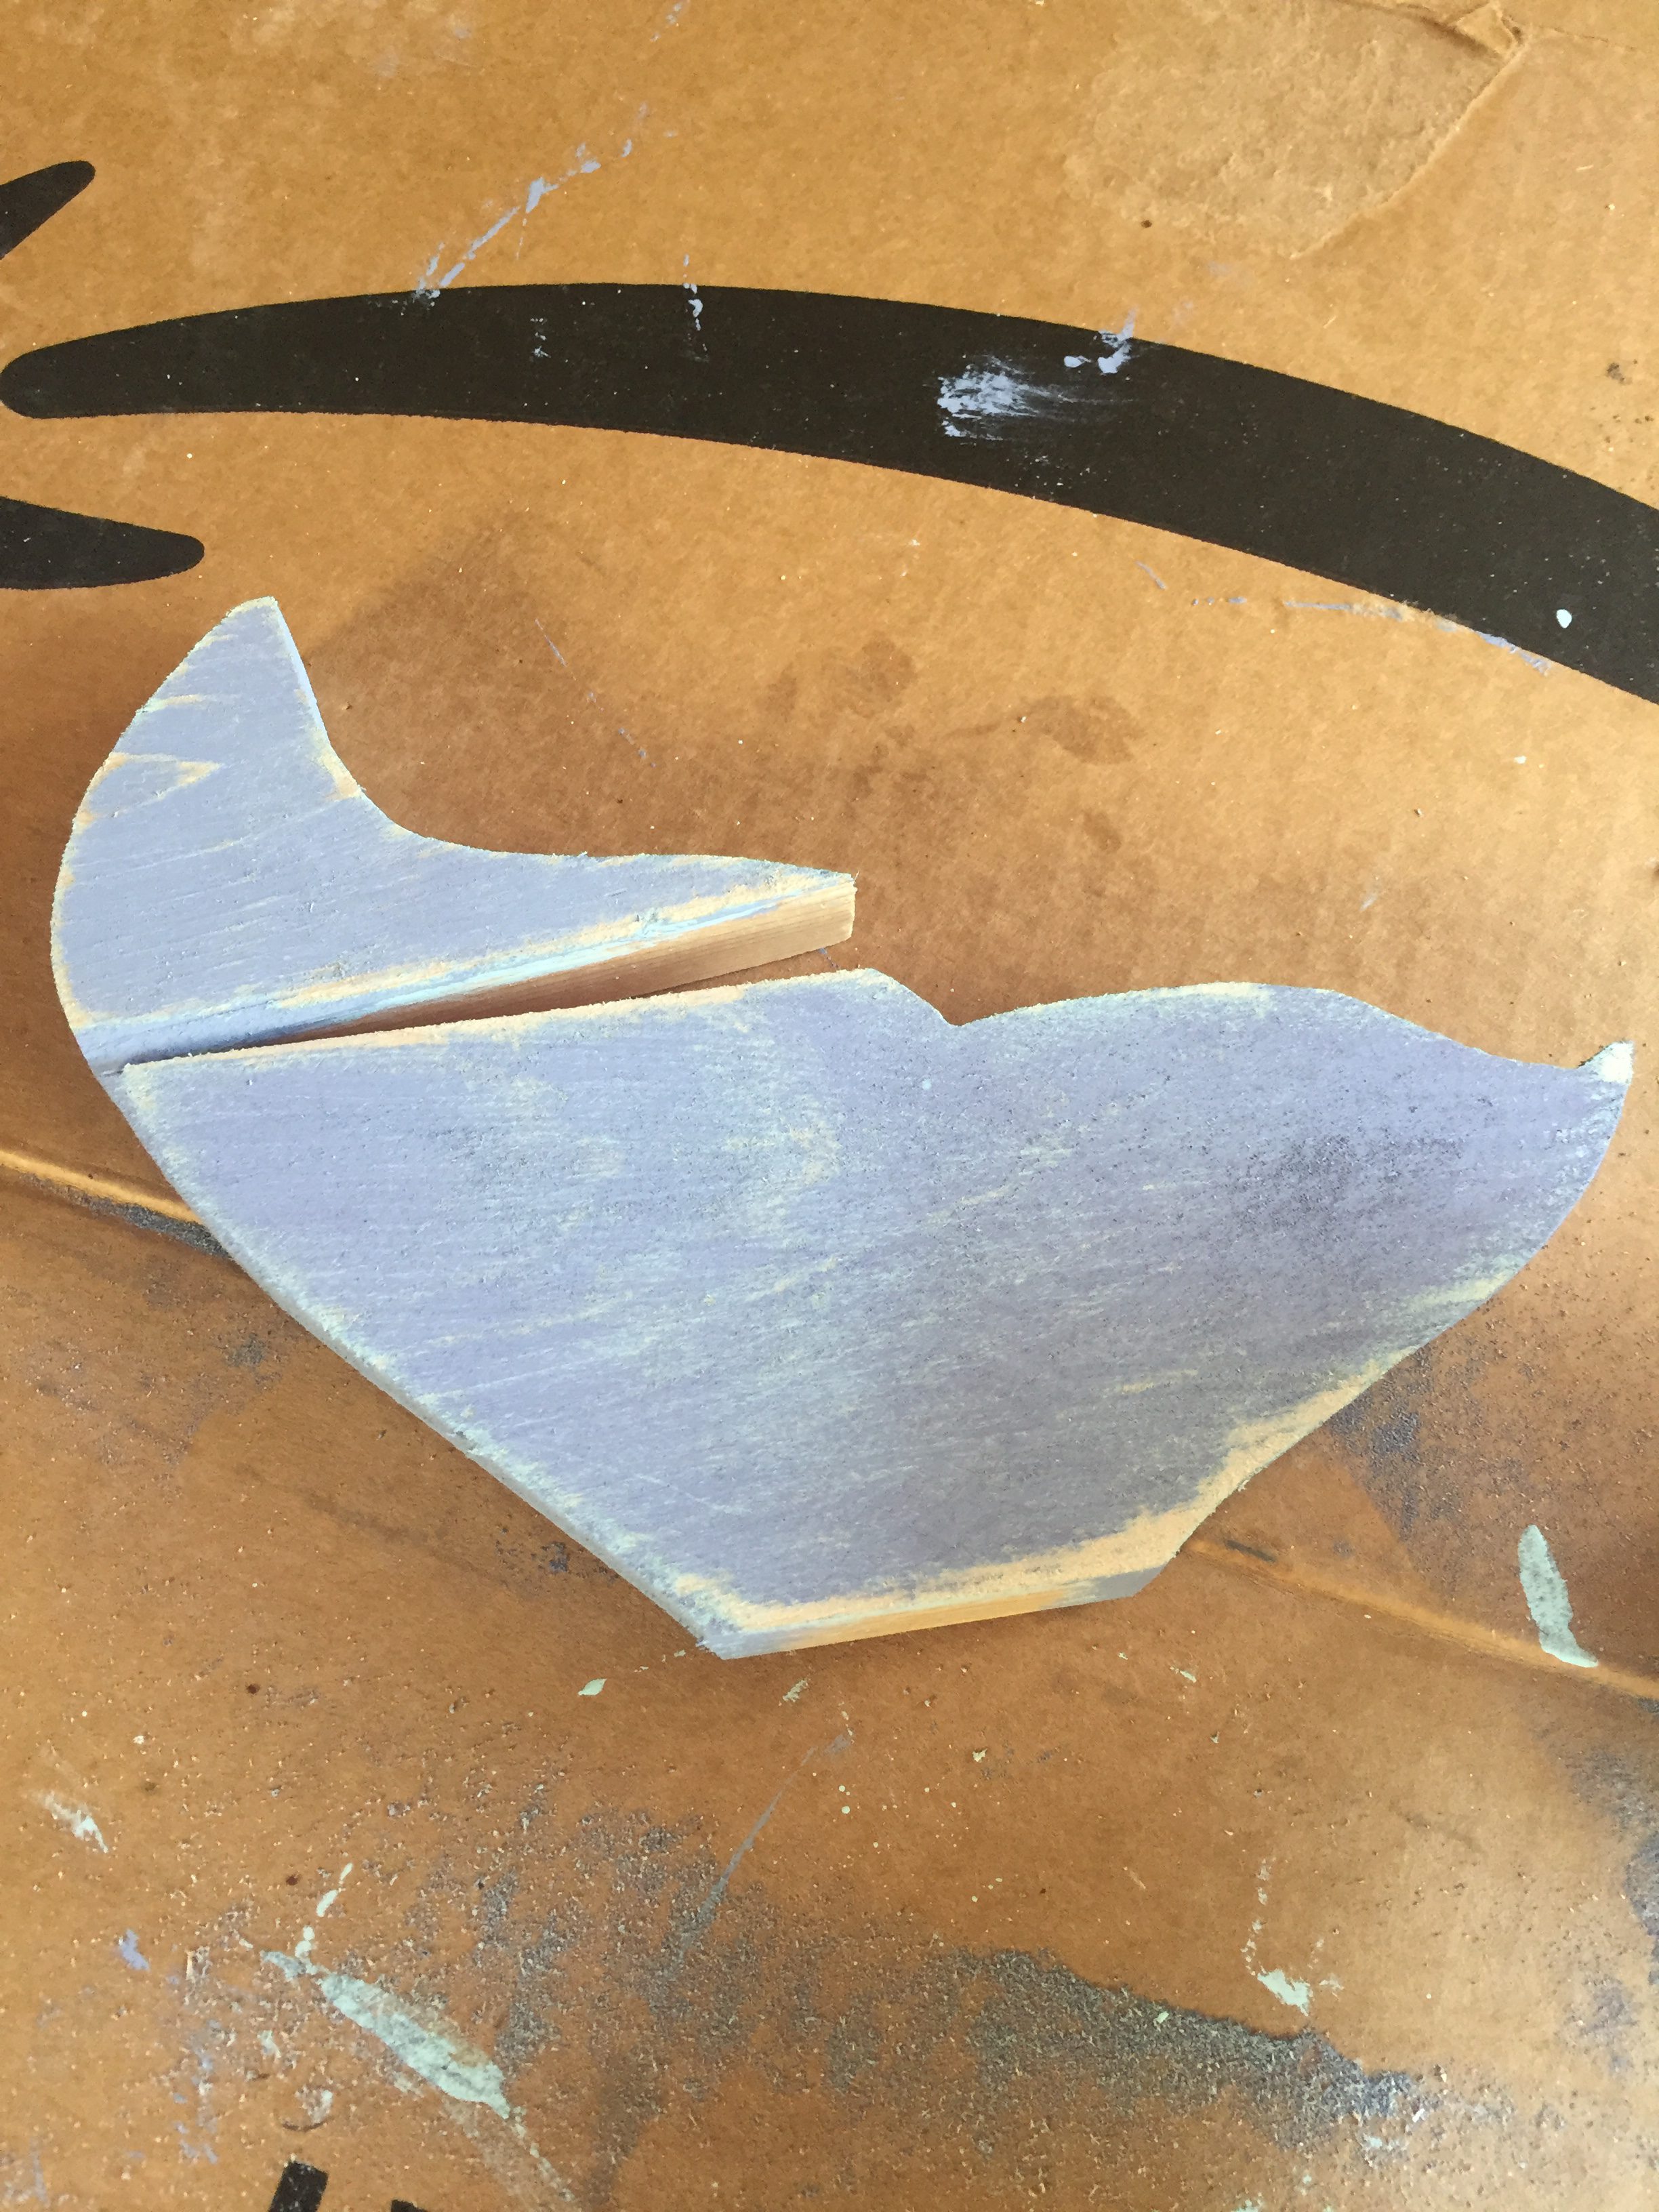
I used my jig saw to cut along my drawn lines. This was the hardest part of the project. It would’ve been much easier with a scroll saw, which I didn’t own at the time of this project (but do now). I used some clamps and my workbench to keep each piece in place while I carefully cut them out.

I sanded down all the edges and tops of my pieces until they were smooth.

I had a few different paint samples to choose from in my garage. I chose a Valspar color called Mystic Sea because I thought it was beachy looking.
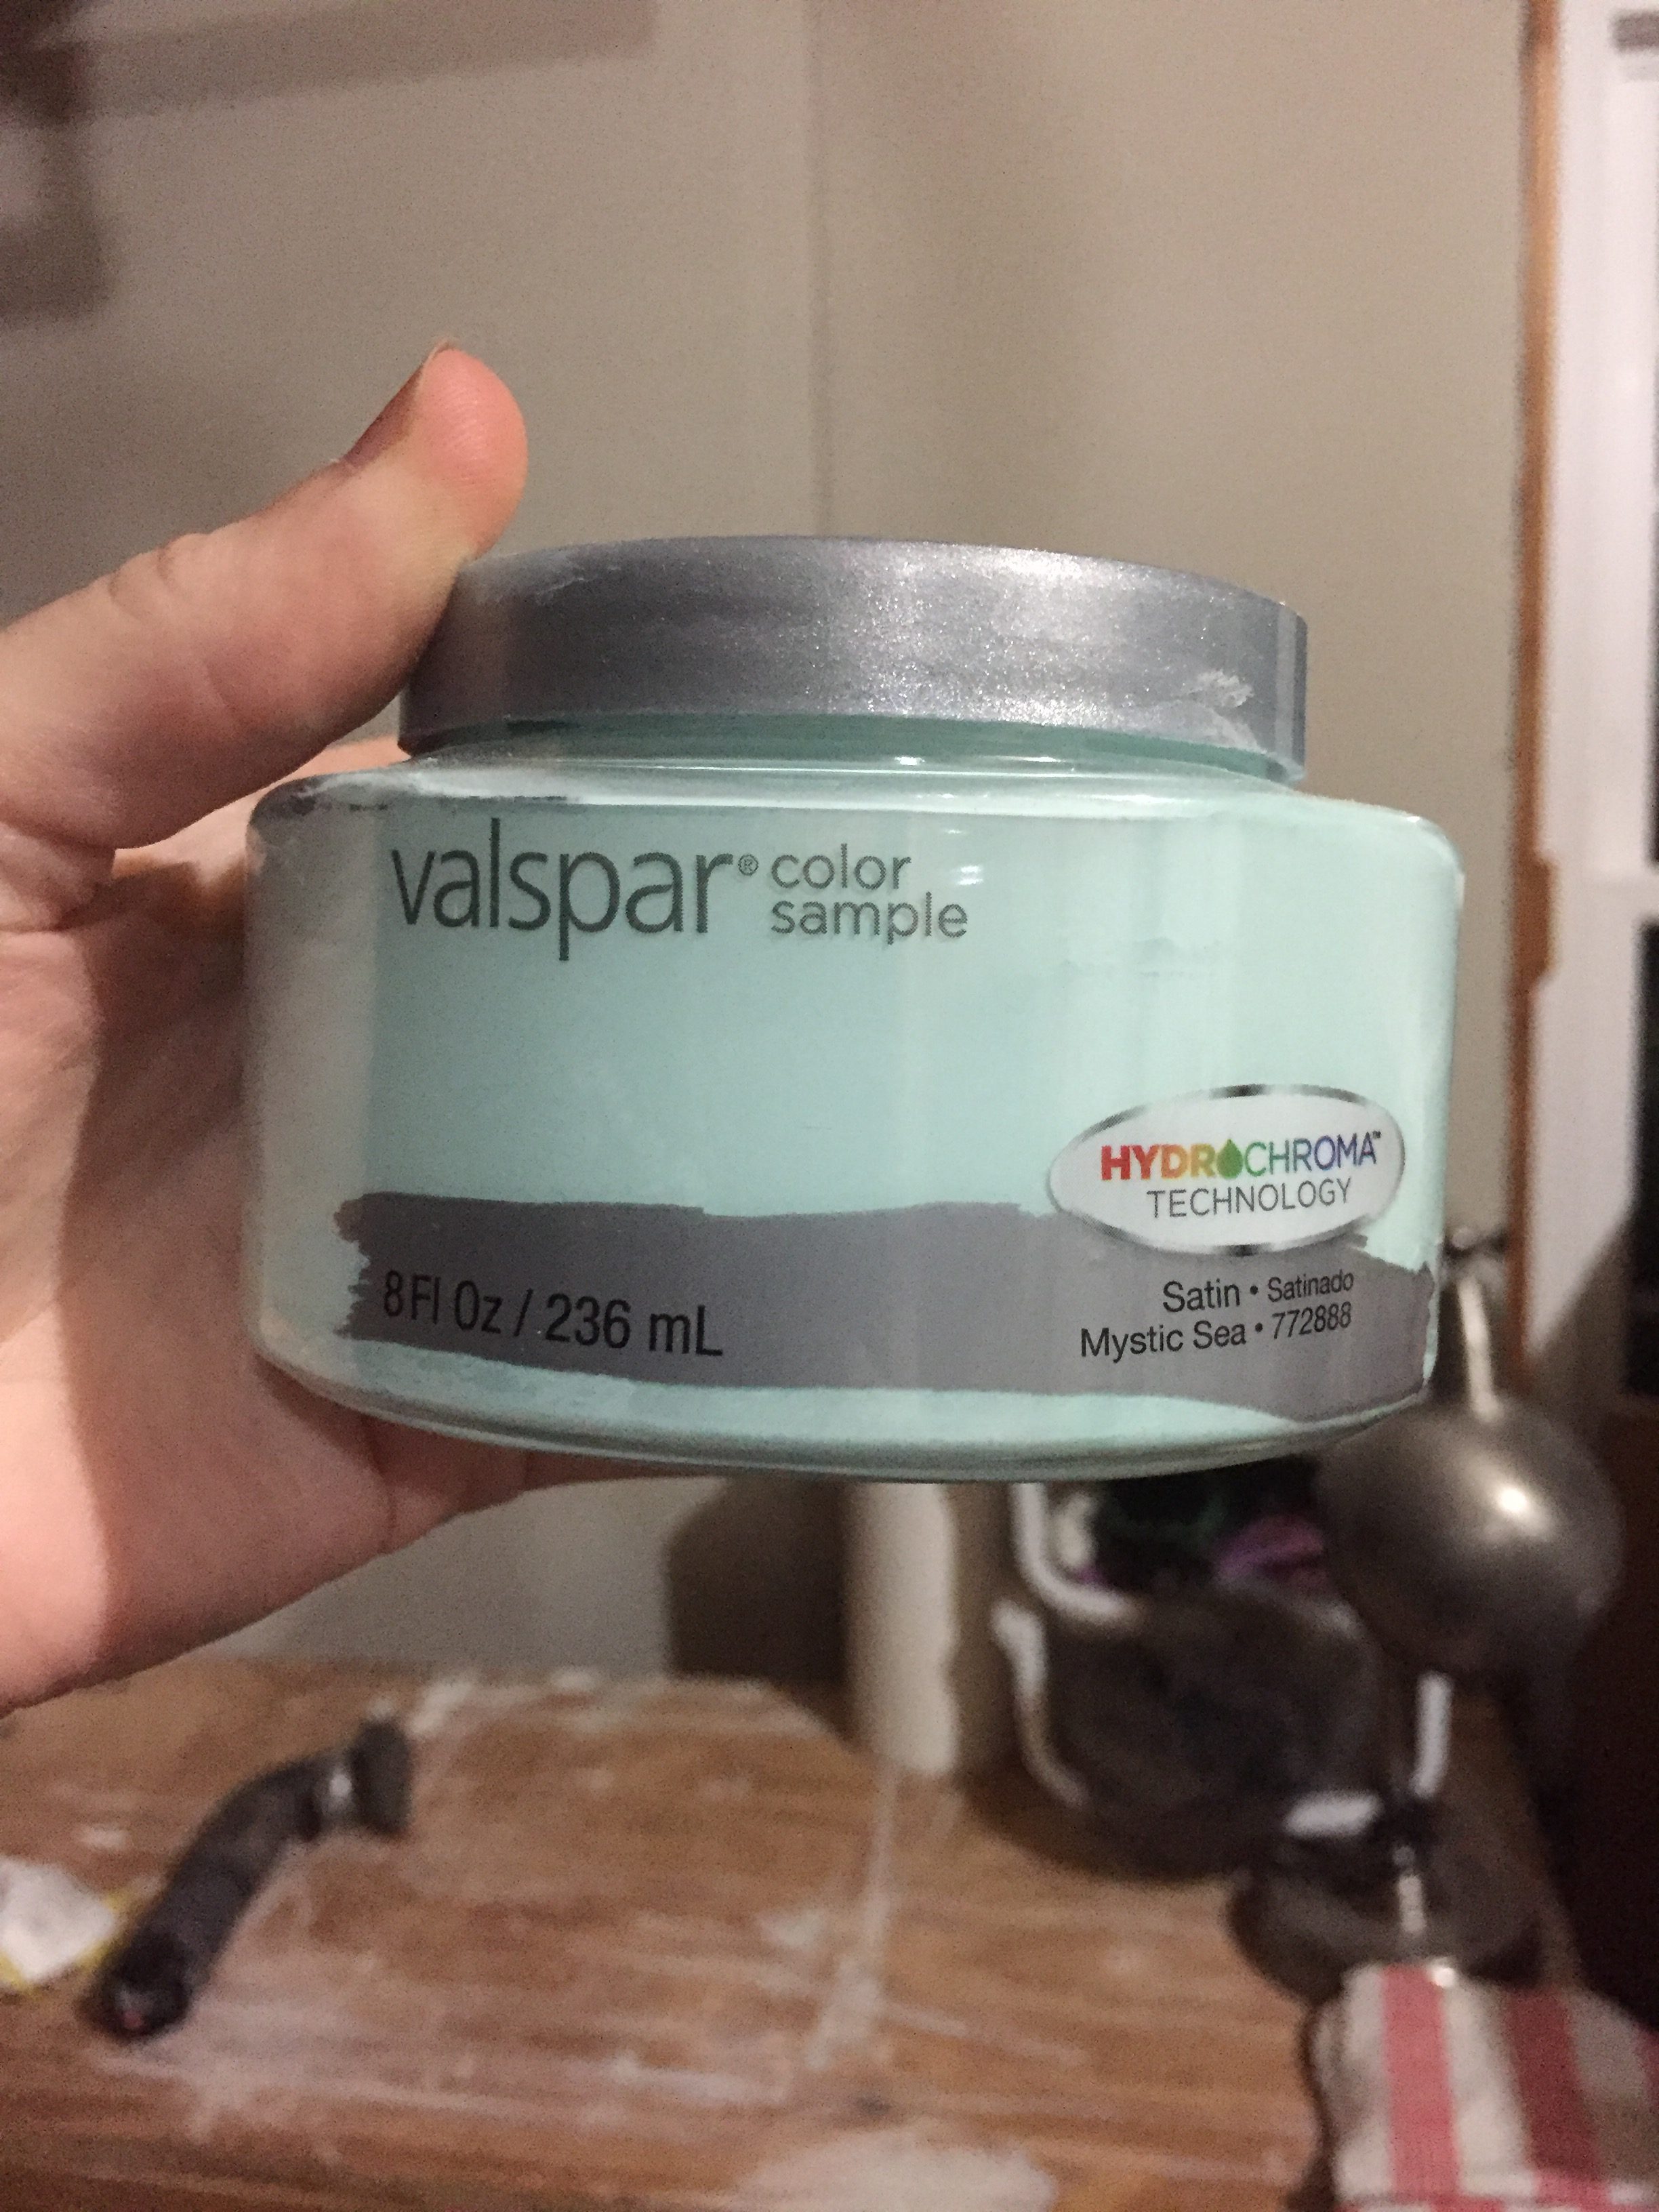
I painted each wood plank, but I wasn’t thrilled with the result.

The color was too light. I painted over it again with another random paint sample I had on hand that was darker.

I was much happier with the second color. I let the planks dry then I sanded over them to give them a weathered look. Both layers of paint showed through and it looked really good! I guess the Mystic Sea paint came in handy after all.
I decided that the white plywood needed some sort of border around it to make the whale really pop. I went through my scrap wood pile and pulled out some thin pieces that I could use as a border. I cut them down to size using my miter saw.

I decided to stain them instead of paint them. I’d painted enough of the project already. I wanted to make sure some wood was visible. I chose a Minwax Classic Gray that I already had.

I used a sponge brush to give the wood one layer of stain and let it dry overnight.

I used a hammer and some brad nails to secure the wood border to the plywood.

I added the whale planks to the plywood. I arranged them in the middle and used wood glue to glue them down. I put some paint cans on top of the pieces and let the glue dry for several hours.

Scrap Wood Challenge = Success!

My mom was very pleased with the result. She hung it on the blank wall in the beach house and I plan to visit it the first chance I get.

Now if only I can do about 50 more projects like this, I might be able to get rid of my pile of scrap wood for good!
Other Beachy Makeovers:
Thrift Store Nautical Tray Makeover
In some instances, I may include affiliate links in posts where I recommend specific products. If you purchase something through one of my affiliate links, I receive a small commission at no extra cost to you. These links are always disclosed.